With summer right around the corner (in full swing for some of you), it’s time to start considering how you’re going to take care of your flowers and lawn this summer. The exterior of a home is so incredibly important as it’s a place that even strangers are going to see on a daily basis. That’s why lawn care and the exterior design of a house should be given top priority when the weather starts to get warm. As the saying goes “April Showers, Bring May Flowers,” and it’s time to begin planning what steps you’re going to take to protect your lawn.
One of the most important aspects of summer, especially if it’s a dry one, is the watering of your lawn and your flowers. This is a crucial step in order to save your plants, as during the past few summers in many areas in the country there have been fewer amounts of rainfall. Without rain, the grass will begin to die and turn brown unless you do what’s necessary and water your lawn. One of the main essential tools is going to be a quality garden hose.
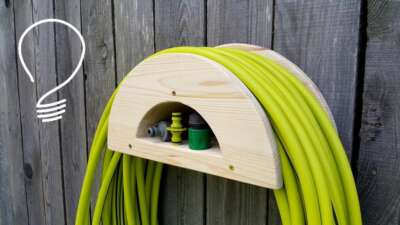
The last time you used a garden hose, did you notice how tangled it got? Do you have a reel at home? Garden hoses are one of the most important things to keep the exterior of your home looking fabulous, but they can be a nuisance if you don’t have a way to properly organize them. That’s why it’s crucial to take the steps necessary to have a reel in place to properly keep it rolled up. Now, some houses are not equipped with a built-in reel and some people simply don’t want to be bothered to buy one. Today we’re going to be looking at a Do It Yourself (DIY) way to make a perfect garden hose reel around the house!
Garden Hose Reel DIY
So first off let’s talk about what you are going to need to create your own garden hose reel. First off you are going to need all of these tools:
- A big wire spindle made of woods
- C-inch plywood
- A hammer
- A plastic C clamp that is 1 inch long
- Level
- A hacksaw
- Wood dowel (4 or 6 inches)
- 2×10 inch treated lumber that is 12 feet long
- measuring tape
- Wooden Screws
- Saw
- Paint
- Power drill
- L-Brackets that are small (2)
Rather than just buying one we are going to take all of these tools and build your own at home. While it may seem a difficult task at first, we promise you that this is going to an easy task and even if you are beginner you will get it done.
Get A Wooden Wire Spindle:
So first off, this is probably the hardest tool that you are going to have to find. There are going to be plenty of companies around you that will have this wire spindles such as for electric supplies or even contact a power company nearby. The best spindle that will work the best should measure 20 to 24 inches in diameter. This will allow you to safely roll up a 25 to 50 foot hose. If you get a larger spindle, obviously you will be able to have a longer hose to work with.
Building the Frame:
Now what you are going to want to do is take the 2 pieces of lumber and cut them into the same size of 20 to 30 inches (depending on the size of spindle you picked up). You can also get the ¾ inch plywood and cut it down for the base, you want it approximately 2 times the length and width of the spindle you have.
Once you know the spindle’s height, you can easily place the two lumber pieces 2 inches wider than the roll you have and also fasten them tightly to the base using the wooden screws. If you happen to have any lumber left over, you can actually brace the 2 pieces of the frame together, securing with additional wooden screws.
Drilling Holes:
Grab your rebar, and measure the diameter. You will then drill holes in the lumber (the 2×19). This lets you center the spindle, allowing the top to be even with the lumbar. (e.g. if your spindle’s diameter is 24 inches, your rebar holes should be 12 inches).
Installing the Rebar:
Thread the piece of rebar through the holes in the 2×10 lumber, and the spindle’s center. Since the weight of the spindle should be a bit heavy, you can use this reel and not worry that the rebar is going to fall out.
The Handle:
Obviously, you need a handle to use this effectively. Simply grab your wooden screws and attach a dowel made of wood to the outside of the spindle. These are where your L-clips are going to come in handy. You can keep them in place by tightening the wooden screws.
What Color Do You Want?
The beauty of any DIY project is that you can customize it depending on what you want the best. We recommend that you use something to match the interior of your garage, or the exterior of your house, depending on where you are putting it up. You can use spray paint or just regular paint depending on what you want.
Conclusion
While that may seem like a lot of work to some of you, we assure you that once you get the hang of it, it is going to be simple. You can always feel great after a DIY project, knowing that you did it all yourself! We encourage you to also look at tutorials on YouTube, so you can have a strong visual to check back with while building your own. Remember, safety is so important whenever building something. So make sure no little ones are nearby as there may be screws on the ground! Have a great time building!